A weak windshield washer spray can reduce visibility during rain, dust, or winter road travel. In 2026, many vehicles use narrow washer tubing, compact pumps, and delicate spray nozzles. These parts save space but can clog easily when old fluid, dirt, or dried detergent collects inside. The key question is: “How to clean and unclog windshield washer pipes?” This guide introduces a careful, practical process for inspecting, flushing, and testing the system without causing unnecessary damage.
Reliable cleaning starts with diagnosis, not force. A blocked nozzle may imitate a damaged pipe, while a silent pump can indicate an electrical or mechanical problem. Check the reservoir, fuse, pump sound, tubing connections, and spray pattern. Use the vehicle manufacturer’s service information whenever possible. Approved washer fluid is safer than household cleaners, which may damage seals or create residue. Disconnecting a pipe and flushing it gently can remove soft buildup. Compressed air may help, but excessive pressure can split aging tubing or dislodge internal fittings.
Small details matter.
Practical maintenance experience shows that rushed repairs often create new leaks. I have seen drivers focus on the nozzle while overlooking a loose hose beneath the hood. This guide also explains when home cleaning should stop. Brittle tubing, a failed pump, repeated blockages, or electrical symptoms deserve professional inspection. The process is usually simple, but not every blockage responds to cleaning. That limitation is worth acknowledging. Clear testing, safe materials, and honest troubleshooting make the final repair more dependable.
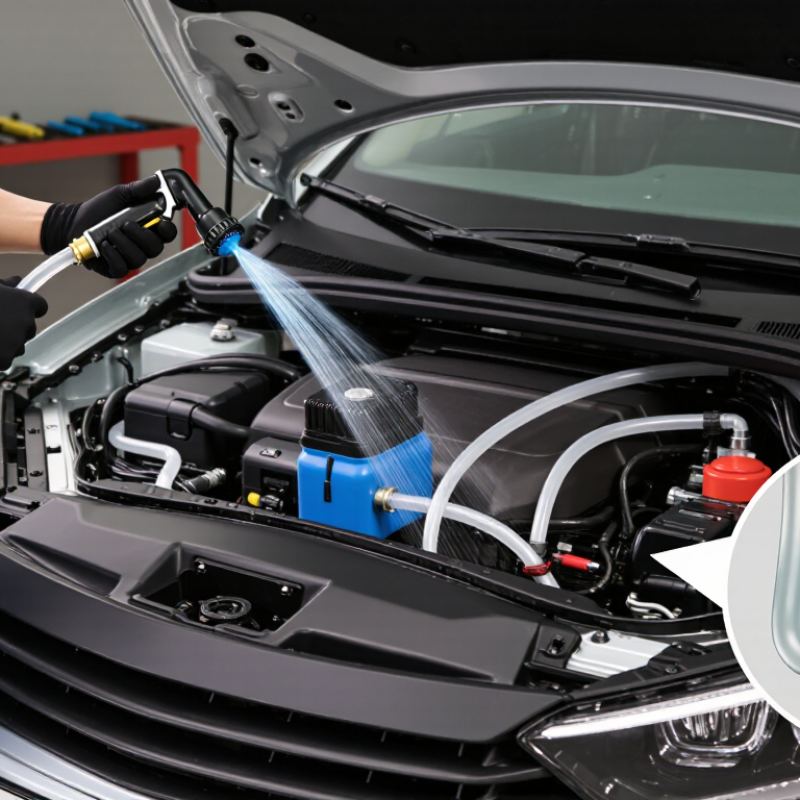
A weak spray often signals restricted washer pipes, not an empty reservoir. One jet may work while the other dribbles. Sometimes, both nozzles stay dry. Listen carefully when activating the washer. A steady pump hum with no fluid movement usually indicates a blockage, kinked hose, or disconnected line. A silent pump may point to an electrical fault or pump failure.
Inspect the fluid level before removing anything. Low fluid can imitate a clogged system. In cold weather, partially frozen fluid may block narrow pipe sections. Dried detergent residue, dirt, and tiny particles can also collect inside nozzles or pipe joints. Look beneath the hood for wet areas. A leaking hose may create a weak spray and a sharp fluid smell. The cause is not always where the symptom appears.
From practical repairs, nozzle blockage is common after dusty journeys or long storage. I once blamed the pump too quickly, then found a flattened hose near the hood hinge. That mistake was useful. It showed why visual inspection matters. Do not force metal pins into delicate nozzles, because they can damage the spray opening. Use clean water and gentle air pressure only after checking the vehicle manual. If the pump sounds strained, stop testing it repeatedly. Prolonged operation can overheat the motor, especially when frozen fluid remains in the pipes.
Before cleaning windshield washer pipes, park on level ground and switch off the engine. Let the hood cool completely. Wear nitrile gloves and eye protection. Washer fluid can irritate skin and eyes. Gather a flashlight, absorbent towels, a small container, soft nylon line, and clean water. Keep a plastic trim tool nearby for stubborn clips. Avoid sharp needles, because they can damage narrow passages.
Check the reservoir, hoses, pump area, and spray nozzles under good light. Look for cracked tubing, loose connections, dried fluid, or cloudy sediment. Place towels below the reservoir before opening any connection. This prevents spills from reaching painted surfaces or the floor. If the vehicle manual lists a special procedure, follow it before touching electrical connectors. The pump should remain off during inspection.
I usually test the system briefly before removing a hose. It helps identify the blocked section. Do not hold the switch continuously. A dry pump can overheat. Disconnect the hose gently, then flush it with clean water or low-pressure air. Excessive pressure may split old tubing. I once assumed a blocked nozzle was the problem, but the hose had collapsed behind a panel. That mistake taught me to inspect the full route, not just the visible tip. Keep removed parts in a tray. Small clips disappear easily.
A clear washer stream depends on more than a working pump. The reservoir and supply lines often collect dust, algae, wax residue, or crystallized fluid. In my workshop experience, a weak spray usually begins with a dirty reservoir, not a failed motor.
Park safely, switch off the engine, and wear gloves. Remove the reservoir cap and inspect the fluid under a bright light. Drain old fluid into an approved container. Do not mix unknown fluids. Wipe the tank with a lint-free cloth, then rinse it with clean water. Check the pickup screen and rubber grommet carefully. Small cracks can admit air and reduce pressure.
Disconnect the supply line near the nozzle, then flush the line from the reservoir side using low-pressure air. High pressure can split aging tubing. Reconnect each section firmly and check for wet spots. Replace brittle tubing or blocked filters. A thin wire may damage a nozzle, so use gentle rinsing instead. The Federal Highway Administration reports that about 21% of annual crashes involve hazardous weather, while wet pavement contributes to most weather-related collisions. Visibility deserves attention. The National Highway Traffic Safety Administration also treats clear sightlines as a basic defensive-driving need.
I once cleaned only the nozzle and missed sediment inside the tank. The spray improved briefly, then failed again. That mistake still matters. Recheck the reservoir after several days, especially before freezing weather. Some residue hides in corners.
Practical inspection, cleaning, and testing guide for common windshield washer system blockages
| Inspection or Service Area | Typical Finding | Recommended Action | Useful Tools or Materials | Approximate Time | Safety or Quality Check |
|---|---|---|---|---|---|
| Confirm the symptom | No spray, weak spray, uneven spray, or a pump that runs without fluid reaching the nozzles | Operate the washer briefly while listening for the pump and checking both spray outlets | Protective gloves, flashlight, absorbent cloth | 2–5 minutes | Do not hold the washer switch continuously; short tests reduce pump strain |
| Check fluid level and condition | Low fluid, cloudy liquid, sediment, algae-like growth, or gelled fluid | Remove contaminated fluid and inspect the reservoir for visible debris | Drain pan, hand pump or siphon, lint-free cloth | 5–15 minutes | Avoid contact with eyes and skin; collect used fluid for proper disposal |
| Inspect the washer reservoir | Loose dirt, leaves, plastic fragments, cracked housing, or a blocked pickup screen | Clean accessible deposits and inspect the pump inlet and sealing area | Clean water, soft brush, shop towels, inspection light | 10–25 minutes | Do not use sharp tools that could puncture the reservoir or damage the inlet screen |
| Flush the reservoir | Small particles remain after draining | Rinse with clean water, gently agitate, and drain until the water is visibly clear | Clean water, suitable container, funnel | 5–10 minutes | Keep rinse water out of storm drains, soil, and waterways |
| Inspect supply hoses | Kinked tubing, loose connections, splits, collapsed sections, or disconnected joints | Restore the correct routing and replace damaged tubing or loose connectors | Flashlight, small pliers, compatible replacement tubing or connectors | 10–20 minutes | Keep tubing away from hot, sharp, or moving components |
| Clear a blocked supply line | Fluid flow stops at a specific hose section or the line feels restricted | Disconnect the affected section and flush it with clean water or low-pressure air | Low-pressure air source, clean water, small container | 5–15 minutes | Use only gentle pressure to prevent tubing separation or damage |
| Clean the spray nozzles | One or more jets are narrow, misdirected, or completely blocked | Soak or rinse the nozzle and use a soft, non-damaging cleaning method | Warm water, soft nylon bristle, clean cloth | 5–10 minutes | Avoid enlarging the jet opening with needles or metal wire |
| Check pump operation | No sound, unusual noise, fluid leakage, or flow that remains absent after cleaning | Check the fuse and electrical connector; replace the pump if it is confirmed defective | Vehicle manual, test light or multimeter, basic hand tools | 15–30 minutes | Disconnect power before removing electrical components |
| Refill with suitable fluid | The system is clean but needs protection against freezing or renewed contamination | Fill with washer fluid appropriate for the local temperature and vehicle instructions | Suitable windshield washer fluid, funnel | 2–5 minutes | Do not substitute engine coolant, household detergent, or plain water in freezing conditions |
| Test the complete system | Spray pattern is restored but leaks or weak flow may still be present | Run several short cycles and check the reservoir, hoses, connections, and nozzle alignment | Clean cloth, flashlight | 3–5 minutes | Confirm both nozzles spray evenly onto the intended windshield area |
| Prevent future blockages | Recurring debris, sediment, biological growth, or frozen lines | Keep the filler cap closed, avoid mixing incompatible fluids, and inspect the system during seasonal maintenance | Clean funnel, approved fluid, maintenance record | 5–10 minutes periodically | Repair leaks promptly and follow the vehicle’s service instructions |
A clear washer stream is a small safety feature, especially in rain. The Federal Highway Administration reports that about 21% of vehicle crashes involve hazardous weather, while wet pavement contributes to nearly 74% of weather-related crashes. Clean nozzles matter when road spray covers the windshield.
Park safely and switch off the ignition. Lift the hood, then trace the thin washer hose from the reservoir to each nozzle. Look for sharp bends, crushed sections, or loose connections. Remove the nozzle carefully if its fitting allows it. Flush the hose with warm water, not boiling water. A soft nylon filament can loosen dried fluid inside the nozzle opening. Do not force a metal pin deep into the jet. My first attempt was too forceful. It widened the spray opening and made the pattern uneven.
Reconnect the hose and test the pump briefly. If fluid reaches the hose but not the nozzle, soak the nozzle in warm water for ten minutes. Blow backward through it with gentle, low-pressure air. Reverse flushing often removes sediment more safely. Check the reservoir filter if the blockage returns. Old fluid can leave crystals. Replace damaged hose sections instead of sealing them temporarily. After cleaning, aim each jet toward the upper-middle windshield area. A service inspection should confirm an even spray across both wiping zones. FHWA guidance also emphasizes maintaining visibility during wet conditions, but washer systems receive less attention than tires. That deserves reconsideration.
Step-by-step maintenance usually involves checking the reservoir, flushing the washer line, cleaning the nozzles, and testing the spray pattern. The chart shows typical hands-on time estimates for each stage.
Start with the reservoir and hose connections before inserting a fine filament into the nozzle openings. Use clean washer fluid rather than tap water, and avoid forcing debris deeper into the pipes. If the pump runs but no fluid reaches the nozzles after flushing, inspect the hose for kinks, leaks, or ice.
A blocked windshield washer pipe often reveals itself through a weak spray or a dry nozzle. I inspect the reservoir, hoses, and nozzle openings before removing anything. Keep the engine off and work in a clean area. Small dirt particles can enter an open line.
Test the system with a short spray. Listen for the pump and watch both nozzles closely. If one side works, the blockage probably sits near the weaker nozzle. Remove loose debris with a soft brush or a fine plastic filament. Avoid metal needles, which can damage the opening. Disconnecting the hose may help confirm where fluid stops. Use gentle, low-pressure air only after checking the vehicle’s service guidance. Excessive pressure can split an aging pipe.
After cleaning, flush the reservoir with fresh washer fluid. Do not use plain water during freezing weather. It can freeze inside narrow pipes and expand them. Check the spray pattern again from the driver’s position. It should reach the glass evenly without striking the roof or bonnet. I once assumed a dirty nozzle caused poor spray, but a loose connection was the real problem. That mistake reinforced the value of testing every joint.
Prevent future blockages by keeping the reservoir cap clean and replacing cracked hoses promptly. Store the vehicle away from dusty construction areas when possible. Inspect the system before winter and after long periods without use. These steps reduce risk, but they cannot prevent every failure. Temperature changes, aging seals, and hidden sediment still deserve attention.
A weak spray, one dry nozzle, or two dry nozzles can indicate restricted pipes. A steady pump hum with no fluid movement is another clue.
Yes. Check the reservoir level first. Low fluid can imitate a clogged system.
Dirt, dried detergent, dust, algae, wax residue, and crystallized fluid may collect inside. Long storage can make the problem worse.
Partially frozen fluid can block narrow pipe sections. Do not keep running the pump repeatedly. The motor may overheat.
Look for flattened hoses, disconnected lines, wet areas, and brittle tubing beneath the hood. Check near the hood hinge carefully. That small area can hide the cause.
Park safely, switch off the engine, and wear gloves. Drain old fluid into an approved container. Wipe the tank, then rinse it with clean water.
Disconnect the line near the nozzle. Flush from the reservoir side using low-pressure air. High pressure may split aging tubing.
Avoid metal pins. They can damage the spray opening. Use clean water and gentle air only after checking the vehicle manual.
Sediment may remain inside the reservoir or supply lines. I once cleaned only the nozzle. The spray improved briefly, then failed again.
Stop if the pump sounds strained or fluid remains frozen. Repeated operation can overheat the motor. Recheck the system after several days.
This guide explains How to clean and unclog windshield washer pipes? It begins by identifying common blockage symptoms, such as weak spray, uneven fluid distribution, or no fluid reaching the windshield, and then reviews likely causes, including dried washer fluid, dirt, debris, and frozen residue. Before starting, gather basic tools such as gloves, soft brushes, clean water, a small container, and suitable cleaning equipment. Safely switch off the vehicle and prepare the washer system to avoid spills or accidental operation.
The process covers cleaning the fluid reservoir and checking the supply lines for buildup or leaks. It then describes how to gently clear blocked pipes and spray nozzles without damaging them, followed by refilling the system with clean, appropriate washer fluid. Finally, test the spray pattern and pump operation from inside the vehicle. Regularly checking fluid quality, cleaning the reservoir, protecting the system from extreme temperatures, and responding quickly to weak spray can help prevent future blockages and maintain clear visibility.

Autowellix Autoparts